I like my creamy soups real thick... like a gravy! Justin, however, prefers his a bit thinner, and that's how we usually make them. This time around, I decided I was in the mood for a thick-ass soup. Really, this could simply be used as a chicken pot pie filling if you wanted, because that's pretty much what it is. Ohhhh... but it was so good! I think I need to heat up some leftovers while I type this up.
You'll note that I used frozen peas & carrots in the recipe, when everything else is fresh. I purposefully did this simply because the frozen peas and carrots ALWAYS make me think about pot pies... that 1950s retro thing, I dunno. I also wanted to be really productive and bake some pie crust to sprinkle on top, but I got lazy (and intoxicated) and went with crumbled crackers instead. And lastly, it seemed like a pain to write this in the recipe, but it calls for 1 cup + 2 tbsp butter. Well, I actually used the chicken fat from baking chicken for those last 2 tablespoons instead of butter, to help lend a little extra chicken awesomeness to it.
NOFX's "Mattersville" came to mind as I was thinking of how homey this
soup was. I haven't thought about this song in a little while, it makes
me laugh. -jen
CHICKEN POT PIE SOUP Time: 45 minutes Difficulty: Medium Yields: About 12 cups
Bonus pic! Deformed bell pepper with alien pods bursting
open inside of it!
1 cup + 2 tablespoons butter
1 large orange bell pepper, minced (about 1 cup)
1 medium yellow onion, minced (about 2 cups)
3 stalks celery, finely diced (about 1 cup)
8 oz package of mushrooms, diced
1 heaping tablespoon minced garlic
1 cup frozen peas & carrots mixed
1/2 lemon, juiced
1 tablespoon fresh thyme, chopped
2 teaspoons rubbed sage
1 teaspoon savory (it's an herb, for those of you not familiar - it's optional)
1 teaspoon paprika
1/2 teaspoon white pepper
1/2 teaspoon cayenne pepper
1 cup + 2 tablespoons flour
4 cups whole milk
4 cups chicken broth (homemade preferable for super chicken flavour!)
2 cups cooked chicken, cubed
Add salt to taste (some broths are saltier than others)
In a large stockpot, melt butter over medium-high heat. Add bell pepper, onion, celery, mushrooms, garlic, peas & carrots. Cook until tender (about 10 minutes with that many veggies). Add thyme, sage, savory, paprika, white pepper, cayenne pepper and lemon juice. Stir in flour, coating all the veggies, and cook, stirring, for about 5 minutes. (It will be paste-like.) Add the milk and broth all at once and whisk until the roux (flour/butter paste) is fully broken down and there are no flour lumps. Continue stirring until the soup just begins to boil, then turn heat to low and add chicken. Taste soup at this point and add more salt if necessary. Remove from heat and serve with crumbled crackers on top.
So this is an older recipe from five or six years back that we decided to resurrect and revitalize. My brother, Drew, always raved about this one since it's creamy, cheesy, pasta goodness with some awesomely spiced chicken so this remake is for him. I used some penne that I had around the house but you could use some fettuccine or whatever you prefer. Also, the mushrooms and sun dried tomatoes are optional and can be added in quantities to your liking or not at all if that's what you prefer.
For musical accompaniment, The Vandals with Urban Struggle. Cause it's the Vandals, that's why. - justin
BLACKENED CHICKEN ALFREDO Prep time: 20min Cook time: 25 min Difficulty: Medium Serves: 4-6
Enough water to boil 1 lb of noodles
1lb of noodles
1 lb boneless skinless chicken cut into 1 inch cubes or thin strips
1 tbs blackened seasoning
4 tbsp butter
1 cup chopped mushrooms
1 cup diced yellow or white onion
1/4 cup diced sun-dried tomatoes
2 tbsp minced garlic
1/2 cup white wine (I used a pino grigio)
1/4 cup fresh lemon juice
1 tsp grated lemon zest
2 1/2 cups heavy cream
2 tsp Kosher salt
2 tsp ground black pepper
1 cup shaved or shredded Parmesan cheese
1/4 chopped green onions
Toss the chicken and the blackened seasoning together in a gallon ziplock and set in the fridge. This can actually be done as early as the day before cooking if you really want to get those flavors in there.
Salt your pasta water generously and bring it to a rolling boil and add your pasta of choice. Bring it back up to a boil and drop it to a low boil for 10 min, or until al dente. Drain and set aside.
When you drop the noodles in the water, bring a cast iron pan up to heat over a medium burner and add 2 tbsp of the butter and let it melt. Add your chicken that had been sitting in the blackened seasoning and let it blacken. The milk solids in the butter, along with the spices in the seasoning, will turn dark and blacken as the chicken cooks. Try not to move it around too much before the surface touching the skillet has time to caramelize a bit. If it doesn't blacken completely, don't fret. You're going to smother it in alfredo later anyway and it's going to taste awesome so no worries.
When your chicken has cooked, remove and set aside. Return the pan to the heat and add the mushrooms, onions, and sun-dried tomatoes. Saute for 3 minutes or until onions become translucent. Add the garlic and saute for 1 minute more. Add the wine, lemon juice, and lemon zest and simmer for 5 minutes, using a spatula or wooden spoon to scrape up all the brown bits from the bottom of the skillet. Add the chicken that was set aside, the heavy cream, kosher salt, and ground black pepper and bring the heat up till the cream is at a low boil. Allow it to reduce by 1/3.
After the cream sauce has reduced and thickened, kill the heat, stir in the butter, Parmesan and the pasta. Mix well and allow the pasta to absorb some of that sauce. Serve it up with the chopped green onions served on top and with a couple of slices of the sun dried tomato if you like!
This is the only new recipe I made for Thanksgiving this year. It was a weird, rare holiday for us... we stayed home and just had dinner for two. Usually we spend it with family, or we host it at our house for friends. But we were invited to dessert and partyin' at a friend's house afterwards, so we told her we'd bring dessert. I was inclined to make something pumpkin-based, but she said her roommate was making a pumpkin dessert. So in a panic, I looked through my pantry and decided to go with peanut butter, pecans and cream cheese because that's what I had. Admittedly, I got a little inspiration from a well-known indulgent southern cook... but I changed up her boring recipe, and it came out awesome. (Plus, her cooking times were jacked up and anyone who would have used her recipe would have been eating her "cookies" with a spoon.) Mine is like a peanut butter cup crossed with cheesecake. WAY easy, too!
I'm not sure why, but I decided to go with some Gimmes for this recipe. Peanut butter is always "fun" for me, and so are the Gimmes. It was so hard to choose which song I wanted to use! But what says peanut butter more than sailing? Duh. Me First and the Gimme Gimmes playing their live cover of "Sloop John B". -jen
Prepare a 9x13 baking dish with non-stick cooking spray. In a medium bowl, combine all of the crust ingredients. Press dough into the pan, making sure it covers the entire bottom evenly and goes up the sides just a little. Bake for 15 minutes until lightly browned and set aside.
In a mixing bowl, combine cream cheese, peanut butter, sugar and vanilla, beating until smooth with an electric mixer. Incorporate eggs one at a time. Fold in by hand 1 cup pecans and chocolate chips and spoon over partially baked crust, smoothing it out until it's even. Bake for 40-45 minutes until edges begin to brown and the center doesn't look wet and jiggly. Let cool completely before cutting and serving.
Ha! I tried to make it fancy... but it looks pretty globby. I'm still working on the pictures, man! I only have a point-and-click camera and some shitty kitchen lighting!
We love garlic in our house even more than we love bacon. Massive quantities of garlic go into just about everything we cook. I've been meaning to make some more soup recently because we had several containers of vegetable broth in the freezer as well as bags full of frozen veggies to make more stock, so I knew I had to use some up. Roasted garlic soup is something neither of us had tried, but we've seen it on a few cooking shows and wanted to try it! Lots of the recipes I saw online were for a completely smooth, creamy soup, but I wanted a little bit of chunky vegetable bite in mine. Man, this soup came out great... we'll be making this one again soon, no doubt!
If you're not real familiar with the qualities of roasted garlic, I think it's important to explain that as the garlic roasts, it loses it's sharp, pungent taste and becomes much more mild and sweet. So if you're not as into garlic as we are, don't let the 4+ heads of garlic in this recipe scare you away! It's really got a pleasant, smooth flavour to it.
Thought I'd go with some F-Minus for this recipe... we'd just finished watching the movie/documentary "Give 'Em the Boot" again the other night, and I was thinking how I don't have many female singers posted on the blog here. So F-Minus, performing "Light At the End". -jen
3/4 cup finely diced red bell pepper (or 1 small pepper)
3/4 cup finely diced carrot (about 2 medium carrots)
1 and 3/4 cup finely diced Yukon Gold potato (or 1 medium potato)
1 tablespoon minced garlic
3 tablespoons flour (or 1/4 cup for a thicker soup)
1 quart vegetable or chicken broth
4 bulbs of roasted garlic (see roasting instructions below, takes an hour to roast)
1 teaspoon Worcestershire sauce
1 tablespoon sherry
1/4 teaspoon dried thyme
1 cup heavy cream
black pepper to taste
shredded Parmesan cheese and lemon wedges for serving
To Roast Garlic: Preheat oven to 400 degrees. Chop the tops of the garlic heads off. Peel away the outer skins (leaving the clove skins in tact). Place on aluminum foil. Drizzle with olive oil and sprinkle with a pinch of salt and a pinch of pepper. Fold foil up around garlic heads and seal. Place foil packet in oven, directly on rack, and bake for 1 hour. Remove from oven, carefully open foil, and allow to cool. To remove garlic from the garlic paper, just squeeze the whole head and the garlic will deliciously ooze out... just be careful not to mix any of the garlic paper in.
** For this soup recipe, I took about 1/2 a cup of the broth and the roasted garlic and blended it until smooth. I highly suggest doing this.
In a stock pot, heat butter over medium-high heat. Add diced onion, bell pepper, carrot, potato and minced garlic. Cook until onion and pepper are tender, 5-7 minutes. Stir in flour to coat vegetables and cook another 3-5 minutes. Add stock and roasted garlic all at once and whisk so that the flour doesn't clump. Add Worcestershire, sherry and thyme. Bring to a boil, then simmer for 25 minutes. Stir in cream and let simmer an additional 10 minutes.
To serve, place Parmesan cheese in bottom of bowl, ladle soup over the cheese, and squeeze the juice of 1-2 lemons into soup.
We should have carved our traditional pumpkins last night because it was Halloween, but instead, I ended up carving up a Red Kuri squash. Actually, I didn't carve it up, because I couldn't get my damn knife through the thing! So I had to wait for Justin to get home from work to cut it for me. There was intoxication involved and I figured I should give up while I was ahead and still had all my fingers. Those suckers are thick (the squash, not my fingers... or maybe my fingers too)!
Thoughts on Red Kuri squash: my favourite squash we've tried so far! I had to taste it after roasting it for the soup, and with just some olive oil, salt and pepper, it had this rich, delicious, buttery flavour. Not as sweet as some squash is, and I knew it was going to be perfect in soup.
Exploring different types of squash this fall has been a lot of fun, and this Red Kuri's been sitting on our table, waiting to be used. Squash-leek soup sounded great, but I didn't really want the thickness of traditional squash soup, I wanted a thinner, brothy soup. I just happened to have the other veggies in the fridge and they needed to get used up, but they were a really great addition, I liked having something to chew instead of a smooth soup and I would definitely recommend them (though you could easily leave them out if you chose). If you're looking for a thicker soup, you could very easily just cut the chicken broth back by half (or more, depending on the consistency you're looking for). The soup was quick and basic, but perfect for the cold, wet night we had. I wanted it to have just a little heat in it, so I used some white pepper and cayenne pepper, but if you're not into heat, you can leave them out.
I've been on an Against Me! kick for the last two weeks, and I had several of their albums thrown on my playlist on repeat while making this... so it was a no brainer for music! This is one of mine and Justin's all-time favourites, "What We Worked For". -jen
RED KURI SQUASH-LEEK SOUP Prep Time: 1 hr, 15 minutes Cook Time: 5-10 minutes
Difficulty: Medium
1 Red Kuri squash
olive oil
salt & black pepper
8-oz crimini mushrooms, diced
1 orange bell pepper, diced
1/2 cup very small broccoli florets
1 tablespoon minced garlic
3 large leeks, greens removed and whites diced
2 quarts chicken stock (or vegetable stock if you prefer)
1/2 teaspoon rubbed sage
1/2 teaspoon white pepper
1/4 teaspoon cayenne pepper
Preheat oven to 425 degrees F.
Quarter the squash and remove seeds and membrane. Rub enough olive oil over the exposed flesh to coat, and then generously salt and pepper them. Bake at 425 degrees for one hour. Set aside. Remove skin when squash has cooled enough to handle.
In a stock pot, heat 3 tablespoons of olive oil over medium-high heat. Add mushrooms, bell pepper, broccoli and minced garlic. Saute until softened, 5-7 minutes. Remove from pan and set aside.
Heat 2 more tablespoons of olive oil in same stock pot, over medium-high heat. Add leeks and saute until tender, 10-12 minutes. Puree leeks, squash and broth together. (If you have an immersion blender, you can add squash and broth to pot and blend. If not, remove leeks from pan and place in a blender with the squash and enough broth to puree, then pour back into stock pot with any remaining broth.) Add the sauteed mushrooms, pepper and broccoli. Stir in sage, white pepper and cayenne pepper. Heat to serve.
This is a recipe I came up with a few years ago and I think it's time to whip it out for the blog! We always had roasted pumpkin seeds after carving Jack-O-Lanterns when I was growing up, but they were only salted and I never dug them all that much. A few years of toying with seasonings and this is what resulted... now we roast them every year! Sometimes we even go back for more pumpkins, just for the seeds! And we've got our pumpkins picked out, ready to carve next weekend... so we'll be making these again to munch on.
Went with "Code Blue" by TSOL... it seemed like it was in the spirit of Halloween (or necrophilia, whichever). -jen
heaping tablespoon of bacon salt (or seasoning salt)
1 tablespoon cumin
1 tablespoon coriander
1 tablespoon Caldo de Pollo (or powdered chicken bullion)
1 teaspoon sugar
couple dashes of cayenne pepper
couple dashes of black pepper
3 tablespoons melted butter
2-3 tablespoons Worcestershire sauce
Preheat oven to 250 degrees F.
Combine all dry ingredients in a small mixing bowl until well combined.
Rinse
pumpkins seeds to get all the pumpkin guts off. Spread out onto paper towels and pat dry. Pour dried
seeds into a large mixing bowl. Pour
melted butter and Worcestershire over seeds and mix. Sprinkle about 1/2
of the seasoning onto the buttered seeds and mix... then add more seasoning if desired - some people like them slightly seasoned, some like them heavily seasoned. (I used about 3/4 of the mix and saved the rest to season
some meat for tacos).
Spread the seasoned seeds out in a
single layer on a cookie sheet and roast for 1 hour and 20 minutes,
stirring the seeds up every 15-20 minutes.
This is Part 2 of our Tall Cans recipes. The first recipe, Tall Can Mexican Black Beans, was actually made with a whole tall can of Tecate. Between the enchiladas and salsa verde here, it's really only 2/3 of a tall can of Tecate, but that just leaves the extra 1/3 for you to finish off. I really liked the beer flavour in the salsa verde. I don't usually use beer when I make it, so this was a first, and I think I'll make it with beer from now on!
Much like the black bean recipe, these recipes were inspired by the
Transplants' song, "Tall Cans In The Air." But since I used that song
for the bean recipe, I think it's fitting that I use a different
Transplants song. Justin and I always joke about their song, "Gangsters
and Thugs", because living in Humboldt County, we can relate to the
chorus, "...some of my friends sell records, some of my friends sell
drugs." It's a good sing-a-long, kiddies. -jen
ENCHILADAS DE POLLO (Chicken Enchiladas) Difficulty: Medium Prep Time: 30-45 minutes Cook Time: 20 minutes (not including the chicken baking) Makes: 15-20, depending on the size of your chicken thighs
6 baked chicken thighs
vegetable oil
1 medium onion, julienned
2 red bell peppers, julienned
2 jalapeños (de-seed for less heat), julienned
1 tablespoon minced garlic
1 cup Tecate beer
1 can (4oz) diced green chiles
1/4 cup cilantro, chopped
1 teaspoon cumin
salt and pepper
corn tortillas (15-20)
salsa verde (see recipe below)
2 cups shredded Monterey Jack cheese
*I seasoned the thighs under the skin with salt and pepper, but left the skins on to bake. Baked at 450 degrees F for 30 minutes. Let cool.
Preheat oven to 350 degrees F.
In a large skillet, heat 2 tablespoons of vegetable oil over a medium-high heat. Add onion, bell pepper, and jalapeños. Sautee for about 5 minutes. Add garlic, Tecate, and 1/2 teaspoon salt, 1/4 teaspoon pepper. Continue cooking until all of the liquid has disappeared and vegetables are soft. Remove from heat to cool.
Discard the chicken skin and shred the chicken meat from the bone into a large mixing bowl. Add the cooked vegetables, green chiles, cilantro and cumin to the chicken, mixing. Taste and add additional salt and pepper to taste.
"Wet" tortillas, fried and dipped in salsa
Place 1/2 a cup of the salsa verde into a shallow dish (I like to use a pie plate) and have an additional plate available to hold the "wet" tortillas.
In a small skillet that will fit a single corn tortilla, heat enough oil just to cover the entire bottom of
the skillet over a medium-high heat, and keep the oil nearby for refills. Using tongs, place a corn tortilla
into the hot oil for 5 seconds, then flip and cook 5 seconds on the other side. Let the excess oil drip into your pan and place the tortilla right into the salsa, just to coat. Remove from salsa, letting excess salsa drip back into pie plate and set the wet tortilla onto your extra plate. Repeat, stacking the wet tortillas on top of each other on the plate until finished. Add oil to your skillet and salsa to your pie plate as needed.
Create an assembly line with your stack of wet tortillas, shredded chicken mixture, shredded cheese, and a large, rectangular baking dish. Place a thin layer of salsa verde on the bottom of your baking dish. Set a wet tortilla into the baking dish, fill with shredded chicken mixture and shredded cheese, and roll, placing the enchilada seam-side down. Continue until your baking dish is full. Spoon the remainder of your salsa (about 1/2 a cup) over the enchiladas, as well as the remainder of your shredded Jack cheese (also about 1/2 a cup).
1 can (28oz) tomatillos, drained (or 7-8 fresh, large tomatillos, roasted)
1 can (4oz) diced green chiles
1 cup Tecate beer
1 teaspoon chicken base (or 1 chicken bouillon cube)
juice of 1 lime
1 tablespoon minced garlic
1/4 cup cilantro, chopped
2 teaspoons dried Mexican oregano
1 teaspoon cumin
salt & pepper to taste
In a medium sauce pan, heat oil over medium-high heat. Add onions and cook for 5 minutes until translucent and tender. Add all remaining ingredients except salt and pepper. Bring to a boil, then turn heat down to simmer for 25 minutes. Pour into a blender to puree (but don't fill your blender more than half-way or it could explode hot salsa all over you! Ouch! Work carefully in batches... or use a stick blender and avoid that whole mess.) Add salt and pepper to taste.
I love when a recipe is actually inspired by a song, rather than coming up with a recipe and then searching for a song to go with it! I'd been in a Tim Armstrong mood the other day (when aren't I?), but wasn't feeling like Rancid, so I pulled out both albums by the Transplants. As soon as I heard the song "Tall Cans In The Air", I knew I had to do a beer recipe with tall cans! I brainstormed a lot of ideas (and will still do more), but in the end, I decided going with a Mexican theme. The black beans are Part 1 of my Tecate dinner, and they came out great! I'm not even a big fan of beans, but seasoned with all these great flavours, I couldn't help but love 'em.
Justin and I actually were discussing whether or not we could taste the beer in the beans... 3 cups in a recipe is a hell of a lot of beer. However, it didn't really seem to stand out. There wasn't a super distinct beer flavour, but I'm sure after simmering for hours with a load of other flavours, it's just going to blend in with the rest. I wouldn't change the recipe at all... though I might be inclined to try a darker beer next time, perhaps a Negro Modelo?
And so I present to you the Transplants (whom I've been listening to all week), doing "Tall Cans In The Air"... lemme see 'em! -jen
TALL CAN MEXICAN BLACK BEANS Difficulty: Medium Prep Time: Overnight soaking Cook Time: 3-4 hours Serves: 6-8
1 pound dried black beans
8 cups water
5 cups chicken broth
1 tall can (24oz) Tecate beer (separated)
1 can (28oz) diced tomatoes
1 medium onion, chopped
1 red bell pepper, chopped
2 jalapeños, chopped (de-seed for less heat)
3 heaping tablespoons minced garlic
1 can (4oz) diced green chiles
1/2 cup cilantro, chopped
juice of 1 lime
3 bay leaves
2 teaspoons cumin
2 teaspoons coriander
2 teaspoons dried Mexican oregano
1 teaspoon salt
few dashes of Green Tabasco
Sort through dried beans to check for small pebbles. Soak in 8 cups of water overnight.
Using a colander, drain soaking water from beans. Place beans in a large stock pot with 5 cups of chicken broth and 2 cups of the Teacate beer. Bring to a boil. Cover and turn heat down to simmer for 1.5 hours.
Add tomatoes, onion, bell pepper, jalapeños, garlic, green chiles, cilantro, lime juice, bay leaves, cumin, coriander, oregano, salt, Tabasco, and remaining 1 cup of Tecate. Continue simmering with the lid off for another 1.5-2 hours. Part way through the second simmer, using a masher, mash up some of the beans to help thicken the sauce. Cook down until desired consistency. Sauce should be slightly thickened, but they shouldn't be soupy.
This is my first attempt at BBQ (note: I have grilled extensively before but never done true, low n' slow, smoked BBQ) and I have to say that the flavor was spot on, though I need to work on getting better color to the finished product. We ate it all before I could get a pic but we'll be doing this again soon so we'll add pics when the next round is attempted.
We have a gas grill so I used that and have to say that the temp control was a cinch. One of the three burners on low was a perfect grill temp of 225 F which exactly what you want. I used a blend of wood chips, half hickory and half apple wood, and the flavor and smell were awesome! An Oneida Digital Probe Thermometer let me know when the internal temp hit 145 F, after about 4.5 hrs in the smoke, and I pulled it, wrapped it in heavy duty aluminum foil, and let it rest for 15 minutes before slicing off the first taste.
It was perfectly medium rare inside but little to no smoke ring present, even though it had the smokey flavor. The dry rub on the outside of the roast didn't quite turn into the "bark" you see on good BBQ but it was definitely an amazing flavor, none-the-less. Since my smoke wasn't super heavy, I'm assuming it didn't color the meat, hence my desire to get more smoke on it next time.
The dry rub recipe contained herein is one of my own devising that would work amazingly on any beef or pork cut and can be applied the night before or the morning of.
A slab o meat, closely resembling brisket, made me think of Jewish deli and our love of pastrami and other cured meats. So, here's some NOFX doing their song, The Brews about hardcore Jewish punk lifestyle. "We separate our milk plates from our meat! Oi, oi, oi!" - justin
Tri-tip Dry Rub Time: 10 min Difficulty: Easy Servings: Enough to cover a 3lb roast
1 1/2 tsp salt
1 1/2 tsp dark brown sugar
1 tsp ground black pepper
3/4 tsp Accent
3/4 tsp ground white pepper
3/4 tsp sweet paprika
3/4 tsp thyme
3/4 tsp rosemary
1/2 tsp cayenne pepper
1/2 tsp onion powder
1/4 tsp garlic powder
1/2 of a bay leaf
Just toss all of this in a spice grinder, or a mortar and pestle, and grind thoroughly. Apply to meat the night before cooking, or at least a couple hours before, and enjoy!
Tri-tip Smoke Steps:
Apply the rub to the roast, place in a plastic bag and leave in the fridge overnight.
Remove from the fridge at least an hour before smoking to let the meat come up to room temp.
Get your gas grill up to temp by turning one burner, not the middle, on as low as it'll go and wait a half hour or so for the grill to reach 225.
While the grill is heating, soak your wood chips in warm water for 15-30 minutes and place them in either foil pouches, or an old tuna can or some sort of metal container that will not give off fumes.
Place you wood chips over the single burner and let the smoke build in the grill before adding the roast.
Place your meat in the grill on the opposite side of the lit burner. You're trying to cook using indirect heat, not the using flames like you would with grilling meat.
Place a drip catch under your meat. Foil works fine.
Insert your digital probe thermometer, if you're using one, and set it to go off at 145 F.
Open a beer and enjoy the smell. Wait.
When the meat is done, use tongs to pull it off the grill and wrap it in foil. Set it aside to rest for 15-20 minutes.
Cut it in slices, against the grain, and eat your heart out!
The lentil soup was really new for me. I'm sure I'd had lentils in soup before, but I have no immediate memory of it. I know we didn't grow up eating lentils. Believe it or not, we DO try to eat healthy at home most the time. And in an effort to better our carb intake (which means cut out the bad carbs and add in the good ones that are low on the glycemic index - ooh, science!), we picked up some green lentils. They sat in our pantry for a couple of months before I pulled them out and just decided to throw together a random soup... which was deliciously successful. I'm not even sure it's fair to call this a "soup". I wanted something a little thicker and hardier, so I suppose it's almost stew-like. Whatever it is, it's good. And that's what counts.
We rocked out with our friend Betsy's excellent Boston choice - The Unseen, singing "False Hope". -jen
ITALIAN SAUSAGE & LENTIL SOUP
1 pound Italian sausage (I used 1/2 mild, 1/2 hot)
2 tablespoons butter
1 medium onion, chopped
4 ribs celery, chopped
3 large carrots, chopped
1 bell pepper, chopped
2 Anaheim peppers, chopped
1 jalapeño, chopped
5 cloves of garlic, chopped fine
1/4 cup fresh basil, chopped
1.5 teaspoons dried thyme
1 teaspoon dried rosemary
1/4 cup flour
1 can (14.5oz) peeled tomatoes
8 cups chicken broth
2 cups lentils
1/4 cup sherry
dash of hot sauce
dash of Worcestershire
salt and pepper to taste
In a stock pot over medium-high heat, brown sausage. When nearly cooked through, add 2 tablespoons of butter. Then add onion, celery, carrots, bell pepper, Anaheim peppers, and jalapeño. Cook until onions are just becoming translucent. Add garlic basil, thyme and rosemary, cooking for another 2 minutes. Sprinkle flour over vegetable and sausage mixture, stirring to mix in and cook 5 more minutes. Then add tomatoes, chicken broth, lentils, sherry, hot sauce and Worcestershire. Bring to a boil, then turn down heat and simmer for 30 minutes until lentils are tender. Add salt and pepper to taste.
Giardiniera is a pickled, spiced vegetable mix, often used as a condiment for food in the Midwestern U.S. Jennifer grew up in the Chicago area and was very familiar with this mix as a topping for Italian Beef sandwiches so we decided to try some here at home. This is not an authentic Italian giardiniera as it has some jalapeños, olives, fennel, etc and the Italian variety, as I understand it, is more spartan with onion, zucchini, carrots, celery, and cauliflower in vinegar.
We just went to the farmer's market, decided what looked good, and went with that for veggies. I suggest that if you like something specific, use it. If you don't like something I used, leave it out or substitute something else. This really is just a pickles veggie condiment so get creative. Do green beans if you like. Get nuts!
While giardiniera is usually pretty hot, I don't like to make mine burn-the-taste-buds-off hot. Add Serrano peppers or more red pepper flake if you like the scorching, mouth-blistering heat.
I know I'll probably hear from 15 different people how this isn't authentic or whatever but you know what? It's not the end of the world. This is: -justin
1 cup distilled white vinegar or white wine vinegar
1 cup olive oil
1 tbsp oregano
1 tsp crushed red pepper flake
1/2 tsp ground black pepper
1/2 tsp thyme
Place all the veggies in a bowl, add the salt, add enough water to submerge the veggies, cover with plastic wrap and leave in fridge over night.
The next day, drain and rinse veggies under cold water. Add the green olives and minced garlic to the drained veggies. In a large bowl, whisk together the vinegar, olive oil, oregano, red pepper flake, black pepper and thyme. Place the vegetables in your storage container of choice (I recommend glass jars), add the whisked liquid. Store in fridge for 2 days before serving.
Note: Storing it in the fridge, the oil will separate and congeal on top. Either take the jar out of the fridge a half hour before you know you'll need to use it. Or if you need it immediately, because it's so awesome you can't wait a half hour, just remove the lid and microwave for 30 seconds and stir.
It's great on salads, sandwiches, soups, as a side dish for a heavy or greasy meal, mixed in rice dishes or casseroles, etc.
This batch was made with broccoli instead of cauliflower. (We prefer cauliflower.)
We also sometimes cut the vegetables smaller for a small relish!
Jen and I love pickles. Jen a little more than me, I think, but we both like the Claussen brand refrigerated dills.
We set about trying to find a good homemade substitute and came up with one that's pretty close to the same taste and equally as good. It's simple to make, costs less than store bought and requires no cooking or canning at all. All the ingredients are cheap and if you don't have them you can find them all at your grocery store for cheap and have enough left over to make tons of pickles.
We've tried this pickling liquid with carrots, onions, English (or hothouse) cucumbers, pickling cucumbers, garlic cloves and a variety of other stuff. Get crazy and add fresh herbs or different spices or add some sweetener if you prefer sweet pickles (we do not happen to prefer sweet pickles). You can also use this for any style of cut cucumber you like; spears, chips, whole, sandwich slices, etc.
The brine tends to last for 3-4 weeks in the fridge and can be reused several times if you happen to go through your pickles quickly, like we do.
I was in a rockin' mood when I made these and thought it was a little odd, and a tad remiss, that we hadn't had a Bad Brains song on here yet in the past 2 years so for your listening pleasure, Bad Brains and Hank Rollins covering "Kick Out the Jams", which happens to be on the Pump Up the Volume soundtrack. An awesome 80's movie, incidentally. Anyway, here's Bad Brains:
Add all ingredients to a 1qt mason jar. Stuff full of cucumbers, or whatever you like, and fill the remaining space with water. Seal tightly with a lid and shake to dissolve and infusilate all the spices and seasonings. Place in fridge and let it pickle. For cut veggies, it only takes a day or two to pickle. For whole cucumbers and such, 3-4 days are required and the bigger the veggie, the longer the time.
I like to slice some ribbons of onion, some carrot sticks, and toss some whole garlic in with the cucumbers and then you've got all the fixins for a good salad or a relish.
You might be wondering what the hell a Choner Bar is, besides an incredibly delicious, chewy dessert. Well, it's my understanding that stoners get the munchies. And I've been told that when stoners get the munchies, they don't want to drive anywhere, so they start digging through their cupboards, making outrageous concoctions with what they have on hand! So a hypothetical stoner might hypothetically have all these ingredients in the pantry and make a hypothetical chewy stoner bar out of them. But we wouldn't want to title our bars Chewy Stoner Bars! That could come with some negative implications, and it's hypothetical, after all... so we shortened it to Choner Bars. Who are we to pretend like we know the culinary cravings of stoners just because we live in Humboldt County?! Please... as if!
I chose The Clash's "Rock the Casbah" simply because someone was talking
about Adam Ant today, and I was explaining my first crushes... which
included Joe Strummer, specifically from this video. So it was just rollin' through my head today. -jen
1 cup chopped nuts of choice (I used 1/2 Hazel nut, 1/2 roasted peanuts)
2/3 cup dark chocolate chips
2/3 cup raisins
Preheat oven to 350 degrees F. Generously coat a 9x13 baking dish with non-stick cooking spray and set aside.
Combine brown sugar, granulated sugar and softened butter in a mixing bowl and beat with a mixer until creamed together. Add vanilla, baking powder, salt and cinnamon; mix in. While continuing to mix, add eggs, one at a time. Then slowly beat in the 2 cups of flour. Fold in coconut, oats, nuts, chocolate chips and raisins.
Press dough evenly into prepared pan and bake at 350 degrees for 35-40 minutes, until a knife inserted in the middle comes out clean. Allow to cool before cutting and serving.
First thing first - I feel it's important to note with this recipe that 3.5 pounds of heirloom tomatoes cost us $12 at our Farmers' Market. If you're on a budget, you can always use plum tomatoes in this recipe instead. But the heirloom are so very, very awesome. It makes a ton of soup, so I'd say it's well worth the cost! And most likely, you're going to have some delicious leftovers.
We make a pretty solid Roasted Tomato & Basil soup, and that was my game plan when I started. But like most things I cook, I decided to try a few different ingredients. It really just depends on what we have on hand and what kind of mood I'm in! As I added the carrots and celery, which don't go in my normal recipe, I started thinking about Bloody Marys and thought, "Why not?!" We really liked how this soup came out! I was so bummed we didn't have any vodka on hand! And we were broke, so we couldn't even run to the corner store for a little bit. The sherry was quite delicious with it, just the same.
As you may or may not have noticed... we've pretty much always posted
punk rock music with our recipes. But let's be real - our music
preferences are way more diverse than just punk. I suppose I could just
choose a random punk song that I like to go with the recipe, but
really, I was listening to Glasvegas the entire time I was making this
soup, trying to sing along in my best Scottish accent (at least the words I understood, which is only about half of them), so it seems like the thing to post. Here's "Geraldine", off their
first album. -jen
BLOODY MARY SOUP Prep Time: 20 minutes Cook Time: 2 hours Difficulty: Medium Serves: 10-12
1 large bunch basil, chopped (2-3 cups packed leaves)
3 green onions, chopped
1 tablespoon fresh minced garlic
2 teaspoons dried thyme
juice of 1 lemon
3 tablespoons Worcestershire sauce
1 tablespoon soy sauce
1 tablespoon green Tabasco (or your favourite hot sauce)
1/2 teaspoon horseradish
1 teaspoon Accent/MSG (optional)
salt & pepper to taste
1/4 cup sherry (optional)*
Preheat oven to 400 degrees F.
Chop the top off of the garlic head to expose the cloves. Drizzle with 1 tablespoon olive oil, salt and pepper. Wrap in aluminum foil. On a baking sheet, toss the quartered tomatoes with the remaining olive oil. Sprinkle with salt and pepper. Place the garlic foil packet in the oven for 15 minutes. After 15 minutes, add the baking sheet of tomatoes to the oven and roast for 45 minutes. (The garlic will roast for 1 hour total.) When cool enough to handle, squeeze the roasted garlic out of its paper right onto the roasted tomatoes and set aside until ready to use.
In a large stock pot, heat 3 tablespoons of olive oil plus butter over a medium-high heat. Add red onion, carrot, celery and red pepper flake. Saute for about 10 minutes, until onion is translucent. Stir in flour and cook an additional 5 minutes.
Stir in the chicken stock and milk, using a whisk to break up any flour lumps. Add the roasted tomatoes and roasted garlic, the canned tomatoes, basil, green onions, minced garlic, dried thyme, lemon juice, Worcestershire sauce, soy sauce, Tabasco, horseradish and Accent. Bring to a boil, then turn down and simmer for about 40 minutes. Add salt and pepper to taste, and stir in sherry right before serving.
*Note: I think this would probably be delicious and more true to a Bloody Mary is you used vodka instead of sherry... but we were out of vodka!
So this recipe is comes from my father-in-law and is one that is a homemade version of the classic Chicago sandwich, the Italian Beef. There are notable differences, the main one being shredded beef vs the authentic, super-thin, deli-sliced beef and the fact that it's braised in a slow cooker rather than slow roasted in an oven. Despite these differences, the flavor is amazing and therefore renders all arguments as to the authenticity of this recipe a mute point. This makes a good bit, as well, so you can have a nice little dinner party or some delicious sandwiches for lunches all week long.
We've done a couple of variations to the original recipe that was passed on and I'm sure others will try some variations of their own, altering it in infinite ways. We've used beer or red wine for the braising liquid, added sliced onions or peppers for some different flavors, and used a variety of herbs and spices and condiments to see what piques the taste buds in new and interesting ways. Feel free to doctor it up any way you see fit and be sure to tell us so we can try it if it comes out well.
To go with a Chicago dish we naturally turn to a Chicago band that needs no introduction. We've featured them before and probably will again at some point because they've been around that long and they're just that good. Screeching Weasel is one of my favorite go-to punk bands when it comes to feeling nostalgic and returning mentally to the days of my youth, so I couldn't help but go with the song "Hey Suburbia" as suburbia was where I grew up for the most part. -justin
ITALIAN BEEF Time: 6-12 hr Difficulty: Easy Serves: 6-8
1 medium onion, about a cup
4 tbsp minced garlic
5 tsp beef bullion or beef base
1 tbsp Italian seasoning
8 oz peperoncini with liquid
2 cups water
22 oz beer
2.5 lbs of boneless beef chuck roast (or other fat laced beef shoulder cut)
Simply add all ingredients to slow cooker and set on low for 10-12 hrs or high for 6-7 hrs. When done, shred the beef with forks, or other suitable utensils, and add back to braising liquid. Serve on a crusty Italian bread roll with some shredded cheese; we prefer mozzarella. To be truly Chi-town authentic, you'd need to top it with some giardinara and dip your roll in the braising liquid, or "juice", before loading it up and serving.
I'm stoked about this recipe, not so much because they were good (and they were!), but because I feel like this has gotten me one step closer to a different recipe! We grew up outside of Chicago and there's a renaissance fair that's just over the Wisconsin border called the Bristol Renaissance Faire. They serve the regular ren-fair food, but there's always been a stand there that serves beer and cheese fritters. These cheese fritters have got to be on my Top 5 Best Things I Ever Ate list. My aunt has had a booth up there for years and I even tried to get my cousin to get the recipe from the guys there, but no such luck. These hushpuppies were way good... and now I have a little bit more of an idea on how to go about making those ultimate cheese fritters.
I heard the Riverdales the other day and hadn't thought of them in a LONG time. I had a friend in college who loved these guys... hometown boys from Chicago! What does "Prince of Space" have to do with hushpuppies? Absolutely nothing. But it does make me think that's exactly what Lumpy Space Princess needs. It makes Justin think of MST3K. As you can see, we lead very uninteresting lives. -jen
1/2 cup corn flour (or grind cornmeal in food processor)
1/2 cup all purpose flour
1 tablespoon baking powder
1/2 teaspoon salt
1/2 teaspoon black pepper
1/4 teaspoon white pepper
1/2 teaspoon cayenne pepper
1/2 teaspoon Old Bay seasoning
1/2 teaspoon KFC copycat seasoning (optional)
1/2 teaspoon dried thyme
2 green onions, finely diced
2 teaspoons minced garlic
1 tablespoon jalapeños, diced fine
1/2 cup fresh sweet corn
2 eggs, beaten
1 cup milk
2 tablespoons butter
1 cup sharp cheddar cheese, shredded
Combine all dry ingredients in a large bowl. Add green onions, garlic, jalapeños, and corn. Mix in beaten eggs until combined.
In a small sauce pan, bring milk and butter just to a boil, remove from heat. Mix the milk into the dry ingredients, half at a time. Add shredded cheese and refrigerate for one hour.
Preheat deep fryer or 4" of vegetable oil in a skillet to 350 degrees. In heaping tablespoons increments, drop refrigerated dough carefully into heated oil. Cook for 2.5 minutes, turning once to cook evenly. Serve hot. We dipped ours in tzatziki, which was a nice refreshing dip that went well with the slightly spicy hushpuppies!
Note: I thought I might like a little sweetness to the batter, so with the leftover batter that I didn't use (maybe about 1/2 the batter), I put a heaping tablespoon of honey in. It lent just a touch of sweetness and I think I'd probably use it in my next batch... or maybe a tablespoon of sugar.
As I've stated before, we are always looking for a better mac & cheese recipe as it is, in my humble opinion, the ultimate comfort food. If you were of the poorer persuasion as a child, then you undoubtedly grew up with the store bought stuff in a blue box (we all know what brand I'm referring to, hopefully) and while that is a suitable quick fix, I've got a recipe that doesn't take very long that comes out better by several orders of magnitude. This can be doctored any way you like. I decided to go with bacon and green onions at Jen's request and I believe it worked beautifully. But you could do roasted garlic, or leeks, or add green beans, or sausage or pepperoni, or whatever you like! Incidentally, you can use almost any cheese, or cheeses, you want with this so get creative if you feel like it. Just remember that the harder a cheese is, generally, the more oily it'll be when it melts. I went with some Colby Jack as it's a good all around cheese for flavor and meltiness and also used some Smoked Gouda to stretch the smokey flavor without overpowering the dish with bacon (is there such a thing?).
To accompany this musically, I went with an old favorite, Down By Law. Their album Punkrockacademyfightsong is a classic and one I've listened to so often that I know it by heart. My favorite song on there is without a doubt 1944 so I went with that, though I listened to most of the album again, just to be sure. It's that good.
Mac & Cheese Time: 45 minutes Difficulty: Easy Serves: 4-6
Preheat oven to 350 degrees.
Pasta
4-6 cups water
1/4 cup salt
1 lb Rigatoni or Rotini pasta (these hold the sauce well but use whatever you like)
In large stock pot or dutch oven, bring water and salt to a rolling boil. Add the pasta and return to a boil. Reduce to simmer and cook for 12 minutes or until your pasta is al dente. Remove from heat and drain in a colander. Place back in pot and cover till compiling the dish.
Sauce
2 strips thick cut bacon, diced
2 tbsp butter
2 tbsp olive oil
1/4 cup shallot, minced
2 tbsp all purpose flour
1/2 tsp salt
1/2 tsp fresh ground black pepper
2 cups heavy cream (if you like a thinner sauce also use an additional cup of whole milk)
12 oz cheese, grated
1/4 cup green onion, diced
In a small skillet, heat bacon over medium high heat until crisp, 4-5 minutes, stirring as needed. Drain off excess grease and set bacon aside. In a 2 qt saucepan, heat butter and olive oil over medium heat and add shallots when the butter has melted. Cook over medium heat for 3-5 minutes or until your shallots start to brown a little. Add the flour and stir in thoroughly. Reduce heat to medium low and brown the flour for 2 minutes. Add the salt and pepper and heavy cream (milk as well if you are using it). Return heat to medium high and bring the cream to a low boil. Add 8 oz of the grated cheese, reserving a third for later use, and the green onions and crisp bacon. Stir continuously until cheese has melted completely.
Add your cheese sauce to the drained pasta and mix thoroughly. Spoon the cheese sauce and pasta into a 2 qt, glass baking dish, sprinkle with the remaining grated cheese, and place in the 350 degree oven for 5 -10 minutes or until the top cheese is melted. Serve immediately and enjoy the cheesy creaminess!
We had our good friend Lua over for dinner tonight and wanted to do something that would be simple and fast, but still have a bit of a "wow factor". Justin and I had been talking about a yogurt marinade recently and having company seemed like a good reason to do it (not that we really needed a reason). So we went with a Mediterranean themed dinner.
What I really like about these three dishes is that I used lots of the same ingredients in everything, so everything just stayed on the counter and got used again and again. That's actually how I came up with the green hummus! I had the intention of just making my regular recipe... but then I had the 3 green onions leftover, the mint, and some parsley from when we did our Italian Chopped Salad. I was super stoked about how it came out all herby and delicious. J and I both decided that every recipe listed below was perfect... lots of times we make a recipe, like it, make it the next time, change it a little, make it again, change it a little. With these, we decided there wasn't room for improvement. We liked them all just as they are. (It was a pretty awesome compliment from Justin.)
The song playing right now in our kitchen, as I was typing this up and deciding what kind of music to post, is Bouncing Souls' "Letters From Iraq". I think it's technically "Fourth of July Weekend", since the 4th is this Wednesday. -jen
In a medium bowl, whisk together all of the ingredients (except the chicken - that's hard to whisk). Combine chicken strips and yogurt marinade in a gallon Ziploc and marinate for at least an hour (longer is optimal!)
The chicken would probably be better grilled, but it's a lousy day so we're baking it. Preheat oven to 350 F. Lightly oil a baking sheet, then line up chicken strips on pan and pour remaining marinade over them. Bake at 350 F for 15-20 minutes (depending on the size of the strips, check with meat thermometer or cook until juices run clear).
Serve on a toasted pita with lettuce, tomato, onion, and cucumber. We like to spread some hummus on the pita and top the pita with tzatziki. Sprinkle with some crumbled feta cheese.
juice of 1/2 large lemon (use other half in chicken marinade)
zest of 1/4 large lemon (use remaining 3/4 in chicken marinade)
1 tablespoon white wine vinegar
1 tablespoon olive oil
1 green onion, diced fine
1/2 teaspoon dill
2 teaspoons fresh mint, chopped fine
1 teaspoon minced garlic
1/4 teaspoon salt
1/8 teaspoon Accent (optional)
ground black pepper to taste
Place diced cucumber in a strainer over a bowl. Toss evenly with 1 teaspoon salt and let drain for 1/2 hour to 1 hour. Squeeze out excess juice. Discard juice and combine the cucumber with Greek yogurt. Add all remaining ingredients and mix. Serve on pita sandwiches, as a dip with toasted pita, or as a fresh vegetable dip.
GREEN HUMMUS Time: 5-10 minutes Difficulty: Easy Makes: 1 cup (maybe 1.5 cups) Need: Food processor or blender
1 can (14.5oz) garbanzo beans, drained
2 heaping tablespoons tahini
3 green onions, rough chopped
2 tablespoons parsley, rough chopped
1 tablespoon fresh mint, rough chopped
1 teaspoon cumin
1 teaspoon coriander
1/8-1/4 teaspoon red pepper flakes (depending on taste)
1/4 teaspoon salt
few grinds of fresh black pepper
2 tablespoons water
1 tablespoon white wine vinegar (or lemon juice)
3-4 tablespoons olive oil
Combine all ingredients except the olive oil in the food processor. While blending, slowly drizzle in the olive oil until desired consistency. Blend for 2 minutes on high until completely smooth. Same application as tzatziki - use in pita sandwiches, to dip toasted pita or tortilla chips in, or as a fresh veggie dip.
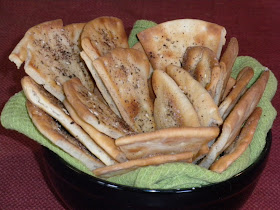
PITA CHIPS Time: 15 minutes
pitas
olive oil
salt and pepper
Zatar seasoning (optional, but awesome)
Preheat oven to 375 degrees. Cut pita into 1/8 sections. Place in a single layer on baking sheet. Brush tops with olive oil. Sprinkle with salt, pepper and Zatar. Bake for 5 minutes. Turn pieces over and bake another 5 minutes, or until crisp. Can be eaten with both hummus and tzatziki.